
When I first discovered the joys of the SX-70 folding cameras, I was lucky enough to be gifted an original one by a friend when we still lived in Brooklyn (c. 2005). It's in good condition and has always worked well for me, but I have a ND filter stuck over the lens so I mostly use it to shoot the dwindling stock of expired Polaroid 600 film that lives in the back of the refrigerator. I suppose I could take the ND filter on and off, but I don't want it to lose its stick.
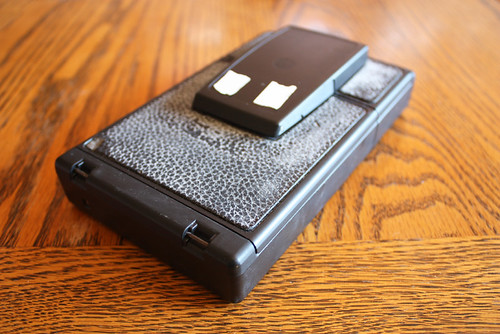
My second one is a SX-70 Alpha 1 SE and I think I bought it at a thrift store when we lived in Pittsburgh (c. 2005-2006) At the time, Time Zero film was still around, and to be honest, I didn't even know you could shoot 600 film in that kind of camera. This camera was in good shape but for the white coating of some chalk-like substance on the leather. I put film in it and if I remember correctly, I shot a few photos and then the camera pooped out. So into a box it went. (Throw out an non-working Polaroid camera? Never!)
Fast forward to 2007 when I actually know more about SX-70 cameras and how it's absolutely possible to shoot 600 film with one. (This little fact totally changed my life. Seriously. Just being able to focus makes a huge difference.) Hence the ND filter on the original SX-70. Then of course Polaroid film decided to stop making 600 film as well, but fortunately, by then, I was savvy enough to stock up on it while it was still available at a reasonable price.
Then came all the fun new films from The Impossible Project and I decided it would be convenient to have a second SX-70, one without a filter on it. I dug the Alpha 1 SE out, put some film in it, shot a few pictures and then it died. Again. Back into the box it went.
I ended up finding a decently priced SX-70 Alpha (red button instead of blue) on eBay. It came to me all the way from Germany. It's in fine shape, but it has a bit of a spitting problem. Sometimes the film just flies out of it. I'm used to it, but it's tricky sometimes when, say, the shot lands in the mud. Or it flies right out past the dark slide and the photo is exposed.
So once again I started thinking that I could use one more camera, one that doesn't spit so much. And also so I could use two different films at the same time instead of having to shoot through a whole pack before trying something new. Of course I can't afford a new camera right now, but then I remembered that I still had one that doesn't always work sitting in a box. So after stumbling across some of Dr. Love's tips on camera care, I decided to pull it out and give it another shot.
This time I loaded up some empty cartridges with "blank" shots and shot them off. And lo and behold, all the shots came out. Woohoo! I did that every day for about a week just to let the camera work out its cycle or whatever, and it kept working. Suddenly I had another working camera. Covered in some gross white stuff.
I decided that the next step was to recover it so I could take it out without getting white dust on my hands. The thought of scrapping the old leather off kind of scared the crap out of me, but I figured I could get through it. Of course before doing anything, I did some research on the internet. I found that you can get pretty nifty skins at skinslove.com and I was super tempted by that black one with the rainbow stripes. Then I found this Flickr discussion thread and discovered Aki-Asahi Camera Coverings. I decided that I would like to stick with the original look of the camera, plus people seemed to have only good things to say about the quality of the coverings.
The company is in Japan, but no matter, my order shipped quickly and I had the new covering by the following week. Also had a bit of a mix up when I placed my order and it was dealt with quickly. I would definitely recommend Aki-Asahi.
Next up, actually removing the old leather. I pretty much followed the instructions here. I also got a few tips from the Flickr discussion thread that I mentioned earlier + some tips from Dr. Love via Twitter.
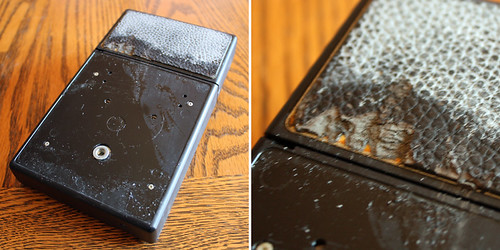
You can see the white stuff I am talking about here. I tried to wash it off any number of times, but it always came back. So I guess the leather was just old.
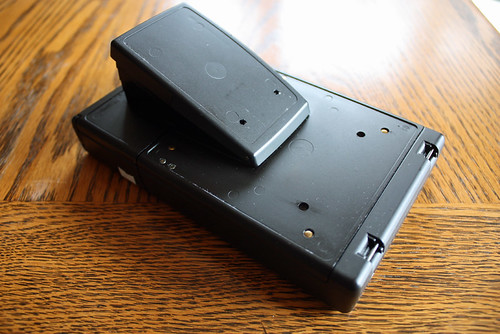
I used a putty knife to start scraping off the old leather. It's the only tool that I have that seemed suitable and it's not so sharp that I could do too much damage to myself. First scrape and the leather pretty much disintegrated and made a big mess. That made me panic a bit as I figured getting all that crap in the camera would not be such a good thing. So I decided to try heating the leather with a hair dryer first. And, as you can see, I also decided to put a little artist's tape over the holes just to be on the safe side.
I heated it up one section at a time, and boy, did it make a HUGE difference. Still got a bit messy, but mostly the heat allowed me to get right to the sticky part and lift a whole block of leather off at once. After removing the leather, I was left with all the sticky gunk. And again, I only did one section at a time. In other words, took the leather off one section, rubbed the sticky stuff off and then moved on to another section.

Initially I tried soaking a paper towel in rubbing alcohol and letting it sit on the sticky area for a few minutes. This did not work so well. The gunk was moving around more than coming off. I ended up using Goo Gone and boy, that stuff works like magic. Rub a bit on and let it sit, then basically the sticky gunk came right off. And the stuff isn't toxic, but because I have sensitive skin, I wore gloves for this part.

Once I switched to using the hair dryer and the Goo Gone, the whole process was done pretty quickly. I now had a naked camera!
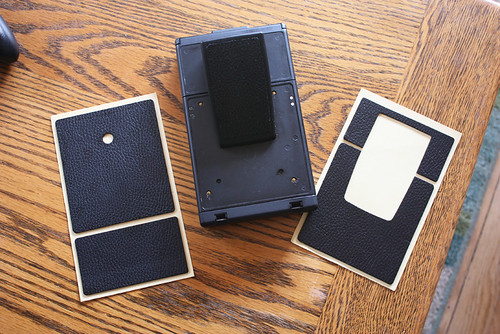
Actually putting on the new leather was not so intimidating. It's cut in the exact size of each section. I brushed alcohol on each piece before applying like Aki-Asahi recommends and that was pretty key in allowing some time to get the sticker straight before it really adhered to the camera.
And then, like magic, a freshly covered camera!
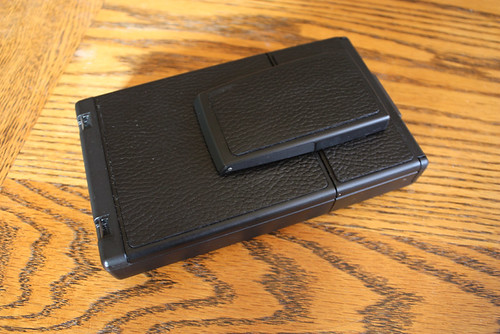
This baby makes me feel like I have a brand new camera. It's so clean and slick and it's been shooting film just fine. I've shot a couple of packs of Impossible films with it and it makes shielding easier since the film doesn't fly out. I'm so happy that somehow everything worked out so nicely...seeing Dr. Love's tips, finding the leather and getting it done.
If you have a camera that needs new leather, you should do it! Just take it slow and it'll all be fine. Put tape over any hole just to avoid getting dust in there and don't pour on too much Goo Gone or whatever remover you use. Best to soak a paper towel and apply it that way.
My only regret? That I didn't get the red leather covering! Next time, for sure.


Using a hair dryer to remove the old skin was the best advice I ever got. Works like a charm! The crumbly leather of the later SX-70s is a real pain in the a** to remove! I always use a hair dryer now, even for non-fiddly bits.
ReplyDeleteGreat post! Just wish the replacement leather kits weren't so expensive. They used to be quite affordable, but all the suppliers are quite expensive now. (Those *skins* don't count; it's not a proper covering, just vinyl.)
wow, you did a fantastic job on reviving that old camera - now you have a 'new' one that you can use -- it's a beauty!
ReplyDeleteThis is such a great post Juli! I've never tried this, mostly because I've been too scared of messing it up and 'cause my camera's aren't TOO bad. But yours looks so snazzy now! I might go for the sky blue one. ;) http://aki-asahi.com/store/html/sx-70/LightBlue/E/LightBlue.php
ReplyDelete